Showing posts with label decoration. Show all posts

Wednesday, August 24, 2011

Our Year 'Round Mantle

In the fall, our mantle changes with each month. I go all out for the holidays. (Check out last year's Halloween, Autumn, and Icy Winter mantles!) But throughout the rest of the year, I just don't have the time or energy to change the decor for each month, so I keep it "seasonal neutral" and just match the scheme of our living room.


It's colorful and simple. I always love having the drawing of our wedding done by my sister-in-law front and center. To the left, is a simple black matte framing a magazine page that matches our decor. (It actually says "May" but I like the way it looks so I leave it throughout the summer months. Hey, it's about what makes you happy, right?)


Further to the left are two silver candlesticks, which were a wedding present from my grandmother and a purple bouquet.


On the right is a grouping of purple vases (which were heavily discounted at Hobby Lobby last year) and one of our wedding reception centerpieces (tutorial here). I added the purple ribbons to tie it into the colors.


And, there you have it. Our year 'round mantle. I must admit that I am very excited to start breaking out the holiday stuff. But, alas, it's only August!


What do you do with your mantle? Change it up every month? Or leave it the same year 'round?

Monday, July 18, 2011

Fireplaces in the Off Season

When it's about a-billion degrees outside (like it is in Texas), our fireplace is the last thing on my mind. But lately, I've been making some improvements to our apartment (lots of posts coming soon!) and I wanted to improve the look of our hearth.

Last winter, we didn't have a chance to buy a screen or even use our fireplace so it's been bare since we moved in. And, go figure, they don't sell that kind of stuff in the summer wit the aforementioned "billion-degree weather". So, I searched out some alternatives to make our fireplace less of a black hole. Here are some of the ideas I love and the one I chose.


image

I love the look of this fireplace in general. It's light and cheery, which is the opposite of what I envision when I think fire. Love it! Get this look easily with some vases in complimentary colors to your room decor and fill with faux blooms to keep your display looking good all through the warm months.


image


I love this idea! Especially for a room that isn't full of wood tones and natural wood furniture. Here, it really brings warmth to the crisp white walls and fireplace. It's not exactly functional if you'd like to use your fireplace, but if you aren't really a fan of the flames or have a non-working hearth, then this would be a beautiful option!


I kept it simple with some pillar candles and a mirror. It keeps option of soft light and looks good when it's not lit. The mirror also helps brighten up the black hole that was our fireplace.


Have you used any of these techniques? Or any other fun ideas? I wanna know!

Wednesday, November 17, 2010

Autumn Mantle

I can't tell you how tempting it was to skip the "Turkey Day" decorating and go straight for Christmas but Josh wouldn't let me. And I just couldn't justify leaving Halloween decor up through November. So, I set out to create a cute Thanksgiving Mantle without spending a thing and by looking around the house and the outdoors, I would say mission accomplished!

On the very left hand side, you can see a branch that I found and spray painted gold. I used these paper patterns to punch out circles and decorate the branch.

I switched out the "October" page for another magazine clipping that reflected a Fall theme and spruced it up with a vintage cookbook I received for Christmas last year.

I decided to leave the birdhouse and mini-pumpkins but added my pumpkin pie candle (yum!) and a vase filled with the cutest little acorns. And used a cursive font to print out a cute sign.

In total, I spent zero dollars! But maybe I paid for it in something else as I tried to inconspicuously tear a branch off of a tree in our complex and pick up acorns from the tree by our bus stop. Eh, it was worth it!

Tuesday, September 14, 2010

Spooky Inspiration

I am so ready for October. Not only does the weather cool down (which I'm dying for) but Halloween is one of my favorite holidays. It's just another chance to get creative. Now, I'm all for the orange and black candies, spider rings, and googly eyed cupcakes for a younger crowd, but Josh and I are considering hosting a small Halloween shindig and those duds aren't going to fly.

It's time to take Halloween to the next level. Sophisticate it, if you will. Here are some inspiration pictures I am loving!


black candied apples


image


subtly bloody candles


image

I have got to make those apples! They look so creepy. And the best thing about these ideas is that most of the materials can be found in your own home already. It's an easy way to put a little spook into your home. Enjoy!

Monday, September 13, 2010

Mexican Souvenirs

It's hard to believe that in a few days, we'll be coming up on a month of marriage. It's even harder to believe that about 4 short weeks ago, Josh and I were lounging poolside in Mexico. What a sad thought.

Our honeymoon was amazing. The beach was beautiful, the room was gorgeous, and the service was amazing. Pretty much every detail fell into place and we both had a great time relaxing after the wedding.

We wanted to make absolutely sure that we brought back quality souvenirs of our trip that wouldn't turn into clutter as soon as set foot into our apartment. So, with one suitcase each (and no intention of checking luggage on the flight), we set out to find worthwhile mementos.

On a walking trip down the streets of Cancun, we found a neat outdoor mall with awesome "Arts & Crafts" stores. Here we found a beautiful stone chess set and 3 hand-painted bowls. They look really gorgeous on our coffee table.


Not to brag, but I recently beat Josh in chess fair and square. So my skills are improving.
But one of the neatest (most cost effective) souvenirs we brought back was a little collection of glass soda and beer bottles. These bottles were available in the room (and included in the price) so after we drank them, we cleaned them out and packed them away. They bring a little bit of a hip-infusion to our newly painted, black bar-wall.

So, all together our souvenirs cost us just over $50.00 and I think we got a lot for our money. And as we approach the one-month mark, I'll desperately miss the beach... and the view... and the drinks, but we still have cute and useful reminders of our awesome honeymoon.

What's your favorite souvenir? Do you collect or go for something different with each trip? I want to know!

Monday, July 19, 2010

New Use for Christmas Ornaments

One of the goals for my wedding is to have as few flowers as possible. Seeing as my budget is $5000.00, lots of fresh blooms are not an option. It might seem crazy, but I really don't see the point. Yes, they are gorgeous... but they die. Quickly. So, for all intents and purposes, you spent how much for decor that only lasts a few days?!? No thank you.

I've seen a few pictures of wedding receptions that have gorgeous ceiling drapes and paper lanterns lit up for a 'glowy', starlit effect. It's beautiful! Though they are less expensive, the cost of paper lanterns can add up! So, I though it would be really neat to use Christmas ornaments (the spherical kind) to hang . Last year, after the holidays, I hit up the sales at Wal-Mart, Hobby Lobby, and Target to get some gorgeous ornaments in my colors. These will be used outside on the deck of our venue as well as inside to add a little extra detail.


Cost:

  • Gold, 40 ct: $7.50
  • Blue, : $22.50

Monday, July 5, 2010

Creative Ideas for Covering Hideous Walls

Making the effort to keep our wedding costs down and the reception close to the adorable historic church we're getting married in, I would definitely say we settled when it came to the reception site. And by settled, I really mean we said we would deal with the hideousness that is this site.

Allow me to paint the picture for you. First of all, it's kind of a "U" shaped building which isn't very conducive to big gatherings of people. Secondly, there are wetland murals painted on the windows... and doors... each and every frikking piece of glass has something atrocious on it.

Proof:

To put it nicely, it ain't pretty. So while I've done my fair share of bitching and moaning over the site, I'm starting to see it as a challenge. Yes, a month and a half away and I'm just now starting to see this. Awesome, huh? I have literally spent the last 2 hours brainstorming ways to make this pretty. Not glamorous or amazing, just pretty. Another thing you should note, is that we are getting married in a small town, with about 2 wedding resources. So that means no Pipe & Drape, no fake wall to be put up, nothing. Oh, bring it on.

We do have some advantages.

1. The reception will be in the evening, so there won't be much sunlight to shine through the animal infested windows.
2. The site actually has good lighting. It can be dimmed to achieve our desired look. No harsh fluorescent lights.
3. I know my way around the creative blog-o-sphere.

Okay, it's about to get crazy but stay with me. I'm thinking tulle and flower strands.

Tulle is the lightest fabric I can think of which means it can be hung easily and it doesn't have to be hemmed. While it won't completely mask the zoo on the windows, combined with the dimmed lighting it will provide a lot of coverage.

Then I thought that alternating strands of silk flowers (on fishing line so it looks like their floating) would be a great way to get more coverage and make a statement. Here are some inspiration pictures. It's a little tough because there's no common color scheme but it's something.

Do you get it? Does it make any sense? Am I crazy? Maybe... Probably.

Tuesday, March 30, 2010

Our DIY Centerpieces - Tutorial

That's right, I'm doing our centerpieces and they are way more simple to assemble than those pesky invitations. Since we're not having a sit down dinner, we're having about 6-8 tabels inside that seat 6 people each. This way people don't have to stand and eat but they can just sit and get up as they please. No assigned seating. There are also picnic tables out on the deck so people can take a break from dancing but I'm pretty sure that there won't be any of these centerpieces on the outdoor tables. I defnitely wanted to keep them simple, classic, and close to the table. So here it goes.

I started out with a round, flat vase that I found at the Dollar Tree for (you guessed it) $1.00 each:


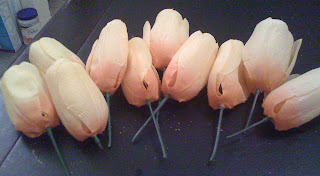
I went to Hobby Lobby and found bunches of tulips that were fifty percent off. I bought about six bunches (3 yellow and 3 white) for $3.50/ea. Before I started, I cut the wire stems to about 2 inches in length and removed the plastic tubing around them to make it easier to stick them in the foam.


You'll also need, a green foam block to keep them in place (I cut the one I bought in half with a knife because it was taller than the vase), double sided tape, and I used 2.25in Christmas ribbon that was the perfect width for the vase (bought after Christmas: 60 ft. for $2.50).

1. Wrap the ribbon once around the vase and secure it with the double-sided tape. Then place the green foam square inside.


2. Now begin assembling flowers.


3. Once I arranged all of the flowers, I sort of "fluffed" them up to fill all of the space. And "TADA", they are done.

Here's a picture of the yellow and white:


Total cost for all centerpiece material:
Flowers (6 bushels): $21.00
Vases (8): $8.00
Foam Blocks (4): $5.00
Ribbon (alot): $2.50
GRAND TOTAL: $36.50
(Pretty good, huh?)

Monday, December 28, 2009

Budget Finds

Hello Everyone!

I thought I'd do a post on a few of the things I've found for a really good deal.

To finish off the last of the Christmas items I got for half price, I start with these decorative branches. They are glittery and 'swirly' and I really love them. There are two in each bunch and I bought 3 bunches. Doesn't that sound like a third grade math problem?? "How many branches did she have, class??" "SIX!!!" lol


Then from the Dollar Tree, I bought a few glass vases. The first is a relatively small dish and I think they will be used for the dessert spread. Perhaps as candy holders.


I purchased three of these.

I also bought two more traditional vases. These will probably also be used on the around the desserts but most likely to house the sparkly branches.
Cost:
  • Branches, 6 ct: $6.00
  • Small dish, 3 ct: $3.00
  • Vase, 2 ct: $2.00

The Dollar Tree can be a gamble, but there have been quite a few times when I have found amazing things for super cheap! Happy Shopping!