Sunday, November 27, 2011

Our Christmas Tree + DIY Ruffled Tree Skirt

I'll admit, I put up our Christmas decorations in a very sneaky fashion. Josh said I couldn't put up any Christmas related decor until after Thanksgiving (something like "one holiday at a time" or whatever). So, on Wednesday I started messing around with a winter mantle (nothing overtly Christmas-y), then, on Thursday, I put up our stockings. But it wasn't until I had our Christmas tree out of the box that Josh even noticed I was being so sneaky. Yes, I'm good.

I just get so excited about Christmas. Mostly because I bought the majority of our decorations on super sale after last Christmas. I've waited a whole year to put up our new stuff. So, here are some beautiful, glowy pictures of our Christmas Tree!


Another, reason I'm so excited about this year's tree is because our old tree was about 2 feet tall and it held about 5 ornaments before it started looking weird. But we're moving up... to a 4.5 foot tall pre-lit awesome tree. Love!

As far as ornaments go, I've got a pretty nice system going on. Josh and I have a small (but growing) collection of meaningful ornaments, that include an ornament from the first Christmas we were dating (2007), an ornament from our first married Christmas together (2010), and this year I added an adorable and inexpensive Texas cookie-cutter fashioned into a Christmas ornament.


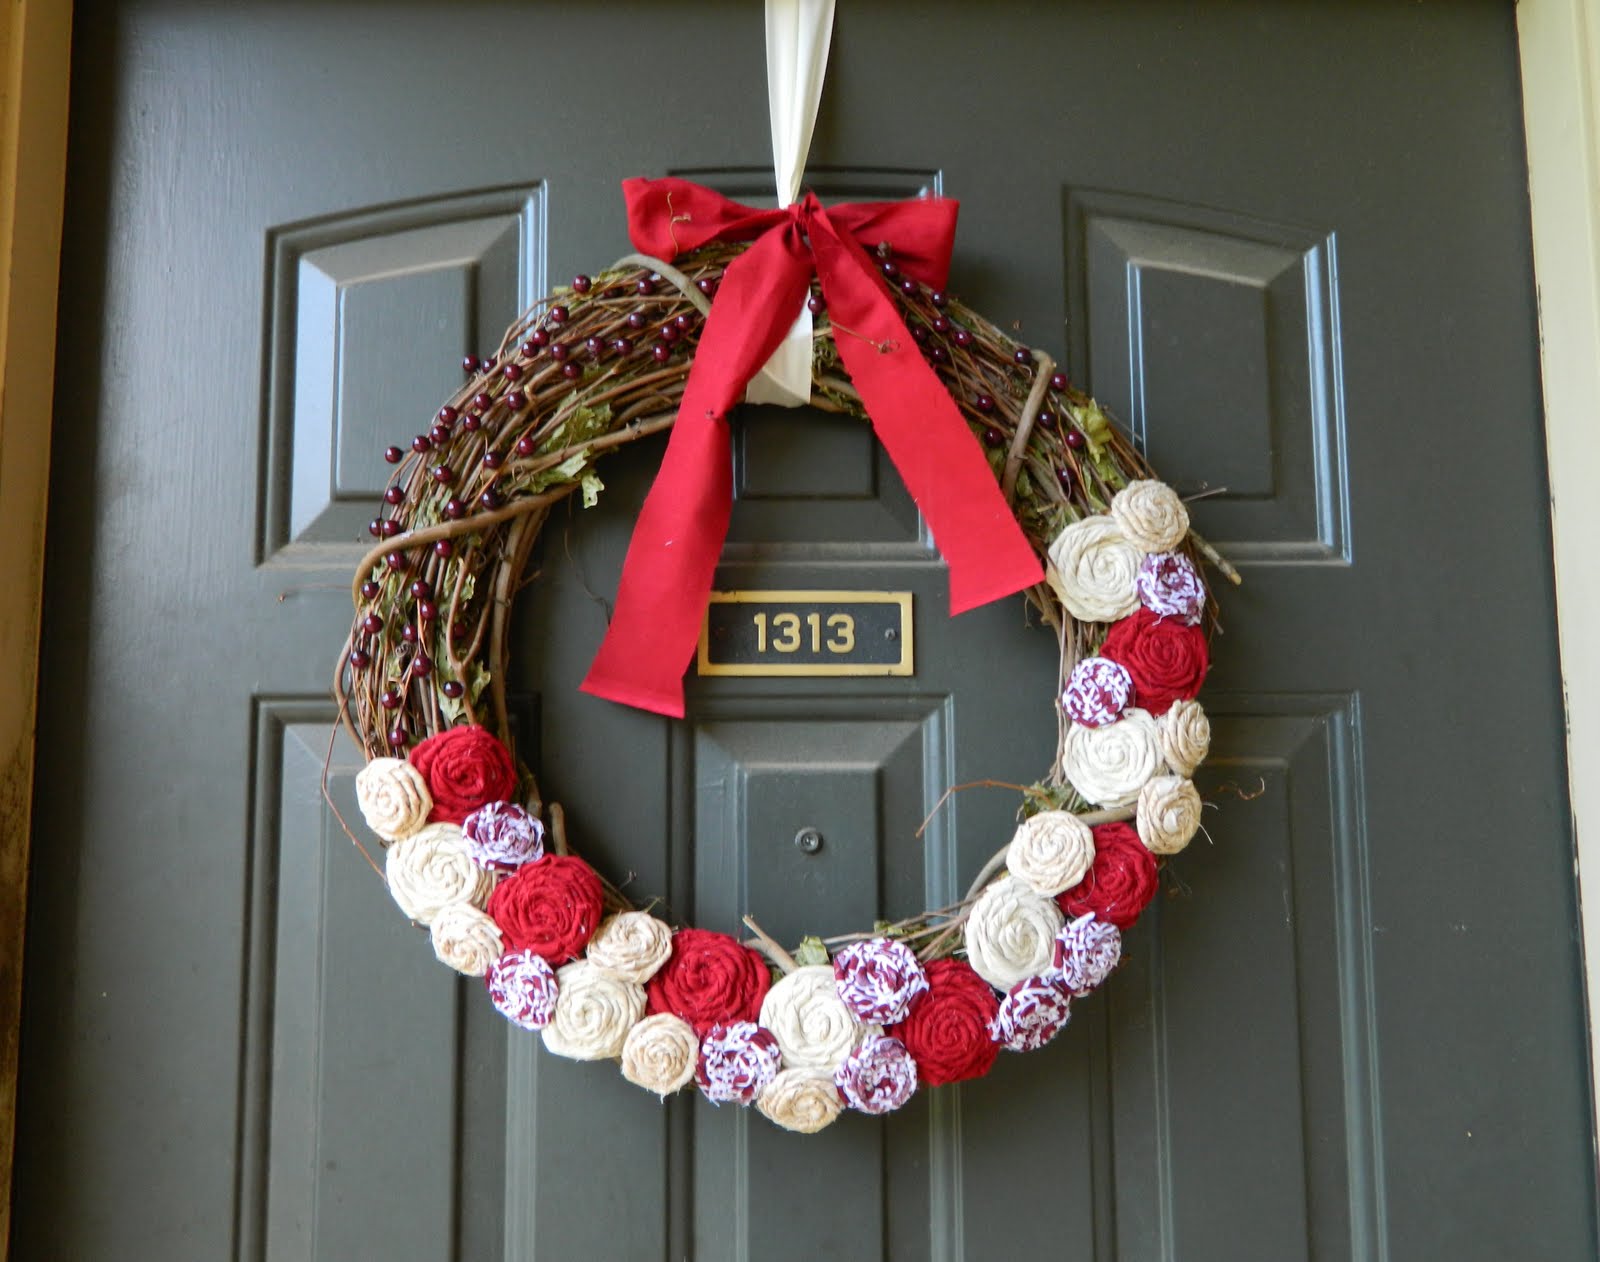
All other ornaments are simple ball ornaments that were left over from our wedding. They are all silver and gold and really let our special ornaments stand out. For garland, I used some leftover fabric strips from our Christmas skirt. Simple and still inexpensive.

Our tree skirt is one of the holiday items I'm most proud of. I found this great tutorial here on Pinterest. In the past, I've always favored bright and colorful Christmas decor, but this year I really got into neutral and metallic decoration, so this tree skirt immediately drew my attention. Plus, it's a no-sew project. Basically, just strips of fabric hot glued to a tree skirt. It took me a few hours to complete and the burned fingers were totally worth it! Take a peek.


So, there you have it. There are a lot more Christmas posts to come including gift wrapping, our winter mantle, and a super easy tutorial on temporarily changing up those cone trees that are so popular now. Stay tuned!

Do you have your Christmas decorations up yet? Or are you waiting for December? Do you go with a theme or color scheme for decor? I'd love to know! And also, I'm on Pinterest!

Monday, November 14, 2011

Gift Wrapping Inspiration

I am seriously getting into Christmas decor early this year. (Sorry Thanksgiving!) And thanks to Pinterest, I've been saving lots of inspiration for pretty presents. While continuing with the never-ending mission to simplify our lives and saving money, I've decided to quit buying wrapping paper and stick with kraft paper. There are so many different ways to customize simple paper, not only for Christmas, but for all other occasions.

Here are some of my favorites below:

Silk ribbon in any color would be beautiful with this bow!


Tutorial on this gorgeous bow here.


Simple customizations for kraft paper wrapping. Use things you already have around the house! Doilies, yarn, or scraps of left over ribbon. The possibilities are endless! I especially love the little star bunting on the bottom!


Fun customizations here


Fabric scraps for wrapping and rosettes! Probably free if you have lots of leftover fabric pieces from other projects. Simple and beautiful.


Found on Babble.


Super simple newspaper and twine. And a simple gift tag solution: single initials.


Not only are these options more beautiful than traditional wrapping paper, but they are simple, and in most cases free! (What beats free around Christmas? I think nothing!) And even though it might be a little silly, I just love the look of coordinating presents! Make the tree look even more beautiful. So, while I'm not allowed to put out Christmas decorations until after Thanksgiving ("one holiday at a time" is Josh's policy) I'm fine just preparing for a great holiday season.


What is your favorite way to wrap gifts? Do you like coordinating colors, paper, and ribbon or is a mix-and-match style more your thing?

Wednesday, November 9, 2011

How You Know He's a Keeper

Josh and I are discussing Christmas gift ideas for eachother and this is what he said:

"Everything I want to get you is too expensive for right now... like a kitchen remodel."

I'll take that!

Tuesday, November 8, 2011

DIY Holiday Wreath - Inspired by Pinterest

So, I finally joined the Pinterest train, and I am in love! It is so much fun. There is so much inspiration for DIY projects, crafts, parties, and home design. Seriously, it's heaven.

But, like many bloggers, I don't want to pin stuff and never actually create anything. So I set out to create a few of my favorites and first up, I made a holiday wreath. Usually, I'm not really really a fan of traditional fall decor. My home design preferences are usually brighter and color colors like blue and greens and the warm tones of fall doesn't really fit, in my opinion. But these two wreaths below, I love!


From Here


From Here

I love the berries and deep reds of the first wreath and, of course, the flower rosettes of the second. So here's my combination.


I picked up an inexpensive wreath from Wal-Mart and some clearance fabric scraps from Hobby Lobby to make fabric rosettes. A few episodes of "The Office" later, I had enough to cover about half of the wreath and start hot gluing them on. The berries were already owned from last Christmas so I threaded them in. I also used a left over shred to make a rustic bow for the top.


I used some left over cream ribbon to hang the wreath on an upside down 3M hook. Removable and I already had it in the house! (I also learned this trick on Pinterest!)


I think I've found my ideal fall decor. Deep wine reds with neutrals tied in. Gorgeous! And not only does this wreath look great for fall, but it could also easily transition into a Christmas wreath with a few tweaks like more metallic accents and a bunting message like in the second inspiration picture. I love it!


All together, I spent about $8.00 total. Yes! Tutorials for both inspriation pictures can be found in their links. Check back later this week for some more Pinterest inspired craft projects!

Monday, October 17, 2011

Check In + Update = Check Up?

Hello October! Where has the time gone? My lack of updates has definitely not been from a lack of content but from an increase of craziness in our schedules! What with events, school, homework, and regular work, Josh and I are always on the move. Sadly, I just haven't had the time or energy I need to get this blog moving.

So, here's an update, and to make it less boring, I decided to unload some of my recent iPhone pictures for fun.

Graduation looms just 7 months in the distance, so it's easy to understand that school is hard. Lots of projects and coursework keep me busy these day. Whenever possible, I like to sleep. Sometimes, Scribble (our pet rat who is actually quite adorable) joins me.


Date nights are few and far between, but recently Josh and I did squeeze in a lame-o date about a week ago where we trolled the mall, Barnes & Noble, and got some frozen yogurt. Of course, we made sure to swing by our local Spencer's to laugh at stupid gifts and trashy Halloween costumes. Check out this cowboy hat made from beer can boxes. One word: classy.


And here is Josh to model it for us.


But, we have still squeezed in time to plan for another Halloween party this month (check out last year's here.) We're definitely experimenting with a different theme this year. In the past, I've never dressed up as anything creepy so I'm getting my zombie gear ready for this party. But not, creepy zombie, cute zombie. Is there such a thing? Stay tuned. But on another note, there are a lot of adorable Halloween decorations out this year! Check out these adorable stair mice I found at Michael's. Perhaps, a future DIY project?


And lastly, being surrounded by people at all hours of the day has landed me a fun sickness. For the past few days, I've been stranded on the couch. And while, yes, that is usually considered rest, but being sick is really draining. So, while I haven't been producing blog content, I have been reading a lot. I just love the blog-0-sphere! So many amazing people and wonderful ideas.

One of my favorite discoveries this month has been Design Seeds. There you'll find all of the most amazing color palettes you can imagine! Based on beautiful, original photography, these color palettes would make it so much easier to plan a room on! Just pick your favorite, take it to the local paint star, and let the fun begin! Check out one of my favorites below:


sushi hues here

There! We're all caught up! Now, let the real blogging continue. I've got some really cool posts coming up like a fun chair makeover, some super easy Halloween projects, and the long awaited kitchen makeover!

Friday, August 26, 2011

Ten Dollars of Goodwill-y Goodness!

A Goodwill trip always starts with the need to make a donation. I pile the stuff into our car, pull into the drive-thru drop off, and make sure to get a receipt for our taxes. Then as I'm rounding the building, I always decide to just stop in and see if there's anything worthwhile. Most of the time... there is. Now that I'm learning more about repurposing and upcycling, I try to see the potential in the items that clutter the shelves. Here's what I got on my last trip:


1. Picture frame/bulletin board combo. It's headed to the kitchen in combination with a new family calendar (that's on its way).*


2. Loofas. Yes, loofas. I bought loofas from Goodwill. Here's how I justified it: they were pre-packaged (not used!) and they were cheaper than those at the grocery store. Why the heck not?


3. Silver hoops. I've never really been a huge fan of hoop earrings, but I saw these and decided to give them a try. At just $1.99, they were the perfect trial pair.


4. I love this wooden jewelry box. I have a lot of jewelry and no real good storage solution for it. This box is like having 4-in-1. It folds back up into one tower and you can pull out whichever drawer you need. It's in need of a good scrub and I'm thinking about jazzing it up a little, somehow. And at just $2.99, it was a bargain!


5. And lastly, I picked up these fun, jazzy silhouettes. Once they're cleaned up (and maybe painted different colors) they would look so great in the office. The office is a completely different vibe from the rest of the apartment. It's much more relaxed with apple green walls and fun art. It really that room's personality and I only paid $1.75 for the set. Once these go up, I'll be sure to give post a photo tour of our work space.


*And I just noticed they didn't charge me for the frame! It was originally priced at $3.55 but it's not on my receipt. By my calculations, the massive donation clothing and electronics I donated today, should cover the frame.


In total, I was charged $10.05 for everything! What a good deal. I'm excited to get these things cleaned up and in place around the apartment. Updates to come on their landing!


Do you love to recycle and repurpose second hand items? Any good finds lately? Link up and share you projects below!


Thursday, August 25, 2011

The Home Stretch

Today starts my final year of college! After 16 years of school, I can see the light at the end of the outrageously long tunnel. I've always loved school, but I cannot even begin to explain how excited I am not to have to carry around a backpack anymore!

Sure, graduation brings on approximately one billion more things to worry about, like full time jobs and paying back student loans, but I am ready for that trade.

So, here's to me. A wish that I will finish this year on a high note, blogging about all the fun stuff along the way.

Wednesday, August 24, 2011

Our Year 'Round Mantle

In the fall, our mantle changes with each month. I go all out for the holidays. (Check out last year's Halloween, Autumn, and Icy Winter mantles!) But throughout the rest of the year, I just don't have the time or energy to change the decor for each month, so I keep it "seasonal neutral" and just match the scheme of our living room.


It's colorful and simple. I always love having the drawing of our wedding done by my sister-in-law front and center. To the left, is a simple black matte framing a magazine page that matches our decor. (It actually says "May" but I like the way it looks so I leave it throughout the summer months. Hey, it's about what makes you happy, right?)


Further to the left are two silver candlesticks, which were a wedding present from my grandmother and a purple bouquet.


On the right is a grouping of purple vases (which were heavily discounted at Hobby Lobby last year) and one of our wedding reception centerpieces (tutorial here). I added the purple ribbons to tie it into the colors.


And, there you have it. Our year 'round mantle. I must admit that I am very excited to start breaking out the holiday stuff. But, alas, it's only August!


What do you do with your mantle? Change it up every month? Or leave it the same year 'round?

Tuesday, August 23, 2011

Dream Design: A Colorful Breakfast Nook

Right now, I am so in love with the idea of a breakfast nook. I've always liked the idea of having two dining spaces; one formal and one casual. When I saw this particular nook, just fell head over heels. It's bright, it's airy, and it's colorful. Three characteristics I covet in design!


Source: DIY Magazine


But what most appeals to me about this room is that it can very easily be emulated. Find the colors and patterns you love and throw them together! With a neutral backdrop, it can all pull together easily! Enjoy all of your favorite colors! And for your enjoyment, I whipped up a little design board for more inspiration on how to create your own colorful nook!


1. For this room, I chose to go with a true gray as the wall color. Gray is actually my favorite neutral. It's a bit more modern than your typical beige and cream. Benjamin Moore's Silver Dollar is a great "true" gray. It will make all of the colorful accessories really pop.


2. Perhaps the focal point of the nook is the pedestal table. White keeps it crisp and, again, neutral. The key making this room work is to keep the major items subtle and then fill in with lots of colorful accessories. For this board I chose the Odyssey White Dining Table by CB2 ($199.00).


3. Start the color parade off with your chair choice! These Tutti Frutti Stacking Chairs by Target (2 for $69.99) are a fun shape and come in several different colors. We actually own them in blue. Of course, any color would be great. I chose pink for this board because


4. I love this pendant lamp! The photo above displays a simple white lamp, but I really loved the pattern and color of the Retro Honeycomb Drum Shade Pendant from Shades of Light ($129.00). If you have a similar set-up as the photo. This colorful lamp can break up the white space if you choose to forgo curtains.


5. Textiles is where you really get to have some fun. These throw pillow are all from The Inglenook Decor, and while they are gorgeous they are a bit pricey ($64, $95, & $80 respectively). You could easily hunt down fun fabrics from your local craft stores or even design your own on Spoonflower and make your own. Same with curtains, if you choose to use them. Short, cafe styled curtains would be another fun way to break up the large windows.


6. I kept accessories down to a minimum for this board. There are so many cute things out there, it's hard to control myself, but this space doesn't necessarily lend itself to lots of knick-knacks. Table decor should be kept to a minimum, to keep as much room open for actually eating. This cute Peacock Blue Recycled Glass Vase from Pier 1 ($39.95) and this Ceramic Owls also from West Elm ($9.00) are adorable table toppers. I also added this Oversize Seagrass Basket by West Elm ($129.00) to stash extra pillows that might get in the way with extra guests.


Do you love breakfast nooks? Or are you more partial to a different dining space? What characteristics do you favor in design? Share below!

Monday, August 22, 2011

Sunday Night Dinner: Enchilades Verdes

Josh and I have lived in South Texas our whole lives. Which means we're used to two major things. The heat and great Mexican food. Even our move to North Texas for school meant Mexican food that wasn't quite up to par with our hometown.

Well, you can imagine how I felt when I realized that our planned move to Oregon would mean a serious decline in the authenticity of my Mexican food! A challenge!!! I am going to be working on honing in the skills needed to make my favorite meals up north.

So, yesterday, I whipped up some Enchiladas Verdes. (Recipe adapted from All Recipes.com) With chicken, queso fresco, and an amazing verde salsa, this dish made my confidence spike! It was delicious! The general consensus was that the salsa was a bit on the spicy side (which is ironic because I only added 2 of the 5 required serrano peppers!!) but other than that it tasted authentic and amazing!


I served up these babies with a sprinklin' of queso fresco and cilantro and had Pomegranate Acai Margaritas to drink. (They were the Daily's Frozen pouches. Have you tried these? Amazing!!)


What have you been cooking up lately? Do you stick to a meal rotation? Experiment a lot? Or both? What's your favorite recipe?

Friday, August 19, 2011

Room Love: pretty & rustic, DIY dining room

Room Love: I save so many photos from the interwebs of gorgeous houses and rooms and I want to share some of my favorites.


Image from here via Young House Love

There is a lot I love about this space! Of course the openness, which I have been craving lately (as seen here) but also the mixture of finishes and textures. I used to hate mismatched everything; furniture, towels, silverware, you name it. It would bug me that things didn't go together. But, as of late, I have really been getting into mixing styles and finishes. It can look amazing if done right!

Here, you've got refinished chairs, an awesome round seat, and even untreated wood in the light fixture but it gels like the room was made that way. This should be inspiration to get those cool mismatched chairs from the flea market, spruce them up with a new fabric and coat of paint, and use them at the dining table. Mix natural elements like natural fiber baskets, a table runner, or (if you're lucky enough to find one) a round bench to liven up a room with a almost entirely neutral color scheme.

And, of course, the coup de gras, is the killer chandelier. Save those recycled wine bottles and create something totally unique. You can easily find bottle cutters on Amazon. Save the tops for a light fixture and bottoms for storage vessels or vases. I bet pillar candles lit up in the evening would make that light fixture look gorgeous!

What do you think? Do you stick with one finish/texture? Or do you mix it up like above? What DIY projects complete your home? Please share!!

Thursday, August 18, 2011

Our reason to DWIT: A Big Move

When I first introduced dwitting, I didn't explain the biggest reason why we were "doing what it takes" and since today marks 5 full years of being together, I thought it would be extremely appropriate to elaborate. Josh and I have lived in the state of Texas for our whole lives and when we moved to college and got married, we decided that it would be amazing to get out of Texas and experience a different state. We pinpointed the northwest as our preference and even further narrowed it down to southern Oregon.


PoppyandPinecone on Etsy (Get your state!!!)


The weather is better, the land is prettier, and you don't have 40+ days of temperatures over 100 degrees. (Yes! That's what's happening in Texas right now. Blech!) It sounds a little crazy, especially since Josh and I haven't ever visited this state, but we're up for a leap of faith. We're in the perfect position to do something like this. No kids, no huge obligations. We just need to get there.


So, this is why we're dwitting. To get to Oregon and start our life. (Hopefully by the end of 2012!)


Have you ever taken a huge leap of faith like this? How did it turn out? Any great advice? Leave it in the comments below! I want to hear about it!

Tuesday, August 16, 2011

Our Bedroom Makeover: Easy changes = Big improvements

Well, fall approaches and things are finally getting back to normal around here. Josh spent the summer working out of town. I stayed home to take some summer classes and work. It wasn't necessarily fun living by myself for the past few months, but I'd like to think I took advantage of the opportunity by sprucing up the apartment. I made major changes to our bedroom and the kitchen and I have plenty of pictures of both!!

There wasn't really anything wrong with our bedroom before, but I felt like the blue we chose when we first moved in turned out to be way too dark for me. I wanted more of a relaxing oasis. I really inspired by a card I bought for my best friend's wedding. (I loved it so much, I bought the card for myself and then baked cupcakes to match!)


want to see more of cupcake pictures? check out my company blog for my eye candy!

Our room already had gold accents with the budget statement art and some other accessories, so only a new wall color was needed to acheive the light airiness of the card I was inspired by. Take a look at the difference it made!


I added to revamped nightstands that I purchased from Goodwill. A quick sanding, coat of white paint, and some new hardware made them clean and stylish. I also got some simple bedside lamps (also from Target) for night time reading. For the past year, we have used TV trays for nightstands and have had no bedside lighting so these additions have been the best by far! New white curtains (also from Target), keep the room feeling airy.

Now for some detail shots. I styled our nightstands with books in a similar color scheme of the room and added a few punches of pink to tie in with the artwork we have by the dresser.


Josh's nightstand is clearly more masculine with the addition of darker woodtone accessories, which tie in well with the furniture.

I was a little sad to see the original curtains I had made for the room go, but I knew white panels would make a huge difference. I contemplated making another set as I had previously and then I found these sheer white panels from Target and fell in love. There is a very subtle, circular pattern on them, and during the day time it is much more pronounced as the light shines through. It almost gives the room an ethereal feeling.


Here you can see the circular pattern on the curtains.

And this revamp was pretty easy on the wallet. Here's how it breaks down.


  • 1 gallon Color Place's "Nature's Cool Water Pond" satin finish: $15.96

  • Extra paint supplies: $15.00

  • Nightstands found at Goodwill: $22.50

  • White paint for nightstands: already owned

  • 2 curtain panels from Target: $15.92 (2 @ $7.96)

  • 2 table lamps from Target: $29.98 (2 @ $14.99)

Total: $99.36


Have you done any budget revamps lately? Or maybe a simple improvements that made a huge difference? Please share!


Monday, July 18, 2011

Fireplaces in the Off Season

When it's about a-billion degrees outside (like it is in Texas), our fireplace is the last thing on my mind. But lately, I've been making some improvements to our apartment (lots of posts coming soon!) and I wanted to improve the look of our hearth.

Last winter, we didn't have a chance to buy a screen or even use our fireplace so it's been bare since we moved in. And, go figure, they don't sell that kind of stuff in the summer wit the aforementioned "billion-degree weather". So, I searched out some alternatives to make our fireplace less of a black hole. Here are some of the ideas I love and the one I chose.


image

I love the look of this fireplace in general. It's light and cheery, which is the opposite of what I envision when I think fire. Love it! Get this look easily with some vases in complimentary colors to your room decor and fill with faux blooms to keep your display looking good all through the warm months.


image


I love this idea! Especially for a room that isn't full of wood tones and natural wood furniture. Here, it really brings warmth to the crisp white walls and fireplace. It's not exactly functional if you'd like to use your fireplace, but if you aren't really a fan of the flames or have a non-working hearth, then this would be a beautiful option!


I kept it simple with some pillar candles and a mirror. It keeps option of soft light and looks good when it's not lit. The mirror also helps brighten up the black hole that was our fireplace.


Have you used any of these techniques? Or any other fun ideas? I wanna know!

Friday, July 8, 2011

Room Love: a living room that's actually lived in...

Room Love: I save so many photos from the interwebs of gorgeous houses and rooms and I want to share some of my favorites.


Bower Power Blog

I love this living space! The warmth of the wood floors and furniture, the bold navy and white, and the mixture of patterns. It just comes together all so nicely. I can picture a family living here and enjoying the space. As much as I love the meticulously styled spaces in magazines and on TV, they can be a bit impersonal. But this room looks like it belongs to someone. (In fact, it belongs to some pretty cool people. The Bowers are a funny, beautiful family that have been blogging for over three years!)


What rooms do you love? Share in the comments!!!

Monday, May 23, 2011

The DWIT Stage: Doing What It Takes

Today was my first day at a new job. Don't misunderstand, I'm still working very hard to create and maintain my own company, Très Sweet Designs, but in this current stage of my life, that particular endeavor isn't covering our expenses. Not only are we trying to cover our current expenses, but we're also trying to get out of student loan debt (before graduation day) and start saving for that "dream life". So, today was my first day at a new job...


That's right, I am currently employed by the world's largest private employer, Wal-Mart. And you know what? I had a lot of fun today. I won't go into the specifics, but I think that it could turn out to be a great and (dare I predict) fun experience.


In honor of this new stage, the husband and I have coined a new verb: dwitting. It's fun to say and it makes sense so, why the heck not? "Doing what it takes" is extremely important to me. I have this wonderful (but not unreachable) idea of our future life and I'm willing to sacrifice my extra time and energy to help get us there. We've got big plans for the future and it's going to be so worth it when that time comes.


*I'll be adding more "dwitting" posts to the blog to chronicle our progress, so stay tuned.

Friday, April 29, 2011

Happy Royal Wedding Day!

While I didn't follow it avidly, I do appreciate the romance that is seeping out of humanity because of the royal wedding!


Today is the day that every woman will wonder, even if only for a split second what it feels like to be a princess! (Or Duchess anyway!)


Wednesday, March 30, 2011

The (First) Adventures of Being Self-Employed

As I was doing my daily blog-hopping the other day, I did my usual visit to Meg at A Practical Wedding and discovered her monthly chronicles of working for herself full-time. I really enjoyed her second post in, what I'm hoping will continue to be, a great series on being your own boss. This particular post detailed the "happiness factor" which so many people credit to owning your own business.


In the first few months after opening Très Sweet Designs, I have had a lot of fun discovering what schedule works for me, what systems work, and what culture I want to create. But the truth is I have yet to really feel that full satisfaction. I attribute this mainly to the fact that I'm still a student working on my BS in Hospitality Management. I'll admit it's a bit frustrating being completely committed to two huge projects, but I really feel like starting up while still in school was the best idea for me. It's like having a little safety net.


I'm actually using and retaining the information I'm learning in my courses and applying it to creating a solid foundation for my company. And instead of getting to graduation day with the sudden need to find/take any relatively good paying job to get student loans paid off, I'm starting that transition now.


My company is in the super early stages, where my main goal is creating a good business plan, implementing smart and efficient systems, and meeting potential clients! But I am planning for growth and preparing to make the full transition into self-employment after graduation. More to come!

Monday, March 28, 2011

The Wedding: Beauty and Fashion

As I explained in this earlier post, the day of our wedding was a little bit different than usual.


When it came down to fashion on the day of our wedding, mine was pretty simple. I bought my dress and cathedral length veil on super sale at Alfred Angelo. I wore super cute, gold peep toe pumps that you can see in my blog header! My pearl necklace was borrowed from my Aunt Brandi and my white gold earrings were a gift from my mom a few days before the wedding. That took care of my something new and something borrowed.


For my hair, I decided to keep it simple and just go straight and "half-up/half-down". After the ceremony, it got so hot outside that my MOH (who was amazing) fixed my hair into a cute low bun with two flower pins.

But what I was really proud of was my make-up. I have super oily skin, so I really needed make-up options that were long lasting. Last year I found the Bare Minerals Matte foundation and absolutely fell in love. It goes on smooth and provides great coverage, but doesn't look cakey. To keep my pretty pink eye shadow going strong, I primed my eye lids with the Urban Decay Primer Potion. Top it off with the Clinique Black Honey Almost Lipstick for some subtle color and I was good to go. 
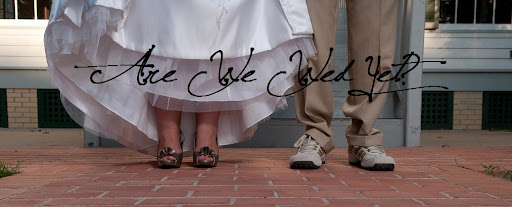
I'm usually one of the people that requires 50+ photos before there is one I actually approve for public viewing, but when I opened up our wedding photos I was really happy with the way I looked. Doing my own make-up let me be in control. I didn't have to worry about an over-zealous make up artist coloring my face. Don't get me wrong, a great make up artist is worth their weight in gold, but not only was this out of my budget but doing my own just made me more comfortable.


What are you doing for your wedding? Hiring someone or going it on your own? Any products that you just have to share? I'd love to know!